
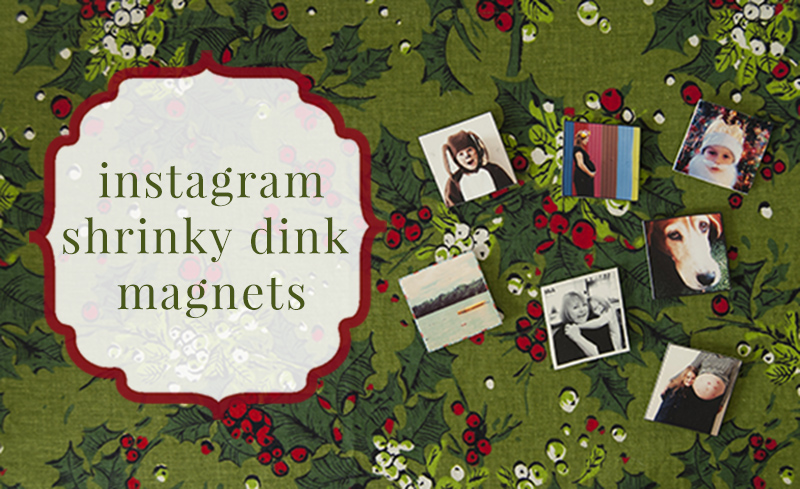

This past year I’ve become a total instagram junkie. It’s my first thing in the morning internet app. What better way to wake up than looking at pretty pictures while drinking coffee? It’s also fun to share photos that don’t have a place on this blog. And this past year I’ve shared a lot. So I thought it would be fun to turn some of these pics into holiday gifts.
I love these instagram magnets because they can be so personal and thoughtful, the supplies are easy to find in your local craft store, and they take less than an hour to make. If your holidays are as hectic as mine, fast is a big plus!
instagram shrinky dink magnets
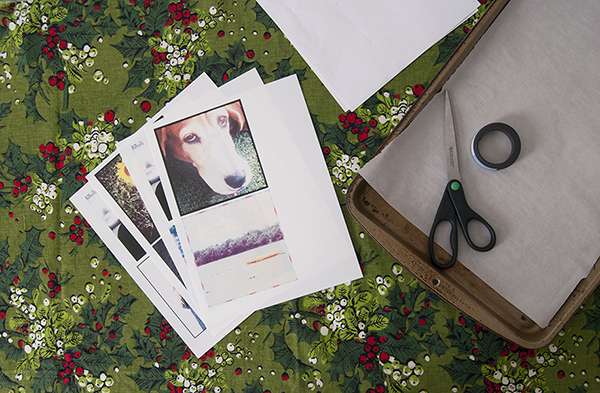
supplies:
- shrinky dink paper for ink jet printers
- instagram account or photos from another source
- scissors
- baking sheet for oven
- parchment paper
- stick-able magnets
First, you need to get the photos from your instagram feed. There’s lots of ways to do this. Here’s two:
1. You may already have them in the camera roll of your smartphone. In the instagram app, click on your profile (bottom right bottom that looks like an old radio). In your profile, click the little blue sun/wheel in the top right corner. Scroll down to “save original photos” and switch button to on.
2. If you haven’t been saving them using your instagram app, you can save them with your computer. Go to the instagram page, log in, and click on “view profile”. Once your photos come up, click on the one you want to save. Right (control for mac) click on “view background image”. Right (control) click again, rename your file and save to your desktop.
Open your saved image in photoshop if you have it, or you can get picmonkey, which is a free photo editor. (I use a mac, and had to first open my image in preview, then save as a jpeg to open it in photoshop).
Once baked, your magnets will be slightly bigger than one third of the printed size. I size my photos to 5.25 inches square in photoshop (do this in Image>Image Size), so they’ll be just about 2 inches square baked. Sounds good. That way I can also fit 2 photos per sheet of paper. I also increased my resolution in Image Size to 300 dpi.

I added a border to some of my photos. To do this in photoshop, Select>All. Then Select>Modify>Border> 30 pixels. Paint in your border (I used black).
*IMPORTANT* Once your photo is ready, you need to lighten it or they will be too dark when shrunk! I did this by going to Image>Adjust>Brightness and bringing it to between 75 and 100, depending on the photo. You want it to look washed out but still show details.
Once you have all your images ready, print them onto your shrink paper. Set your printer to high quality printing, photo paper (matte if possible) and best print mode. Trim the paper to your photo borders.
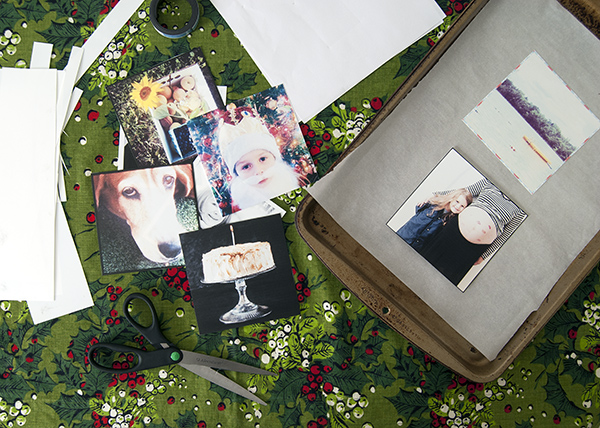
Place parchment paper on baking sheet and put trimmed photo on top of parchment paper. Put into a 275-°300 oven for 3-5 minutes. Watch your photos! When they have curled and re-flattened, give them 30 more seconds, then take out of the oven and smooth the top with a clean piece of paper til cool. Let cool completely then stick magnet to the back. Done!

TIPS: the shrinky dink paper I used can be printed on both sides, and when cooked becomes opaque, so if you change your mind about a print, just print on the other side.
A few of my magnets curled up in the oven and refused to go flat, so buy more paper than you think you need, just in case.
Oven temperature seemed to be a big factor in how well these shrunk. The sweet spot for my oven was 290°. So do a little experimenting one magnet at a time.
Some of my magnets cooked into rhombuses instead of perfect squares.
Pingback: Handmade Holidays Blog Hop – Studiokatie
Pingback: DIY Tote Bag – My Site
Pingback: Handmade Holidays Blog Hop
Pingback: Easy DIY Girls-Teens Gift Set | A WordPress Site
Pingback: Make this Sassy Women Journal Gift : Ice Queen E-Zine
Pingback: Oval Jewelry Hanger – Handmade Holidays 2014 | walnuthollowcrafts
Pingback: Handmade Holiday Hop Day 2 | Pink and Main Blog
LOVE the personal touch of magnets made from family photos.
Shawn ~
Design Team Coordinator for The Buckle Boutique
Personal Blog ~ Crafty Chics Blog
and
MyCutSearch.com ~ Find your Cricut images FAST!
This is super creative. I would love to make ornaments doing this.
Thanks for sharing fast enough for even the people who have no time like myself can do!
Pingback: Handmade Holidays Blog Hop |
Pingback: Handmade Holidays Day 2 : Ice Queen E-Zine
This is super cute! i know some grandparents who would love these 🙂
Pingback: Handmade Holidays Blog Hop 2014 – Day 2 |
Pingback: Handmade Holidays Blog Hop Day 2 – Shimmer Sheetz Bangle Bracelets | Elizabeth Craft Designs
Pingback: Handmade Gift {A Pre-made Scrapbook}