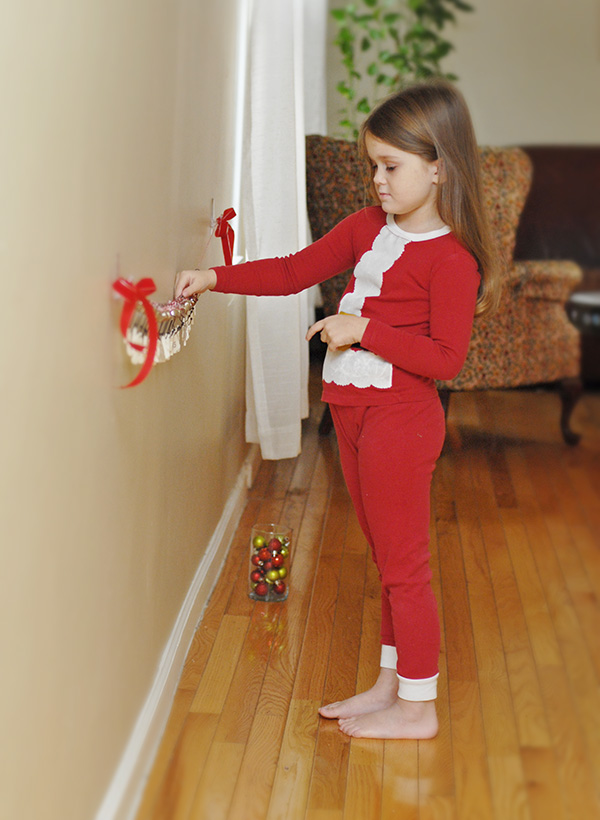
 Have you seen all the lovely advent calenders people have been making this year? I see them everywhere, beautiful embroidered felt masterpieces that will be passed down for generations. Calenders with little gifts for each day, wrapped in homemade paper boxes and topped with miniature topiaries. This is my favorite one, which I swear I will make next year. Because this year, I completely dropped the ball. Somehow it just crept up on me, and there was simply no time to make a future heirloom. But I couldn’t let it go by completely. So I made an abacus style advent calender with jingle bells and white clay ornaments. This only took me an afternoon. The longest part was tying the jingle bells onto the hooks (I have no idea why) so skip that part if you’re in a crunch.
supplies for calender:
- baker’s twine
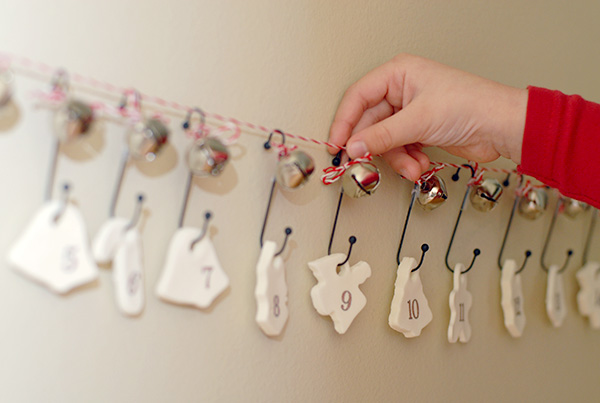
- 2 hooks(I used clear command hooks)
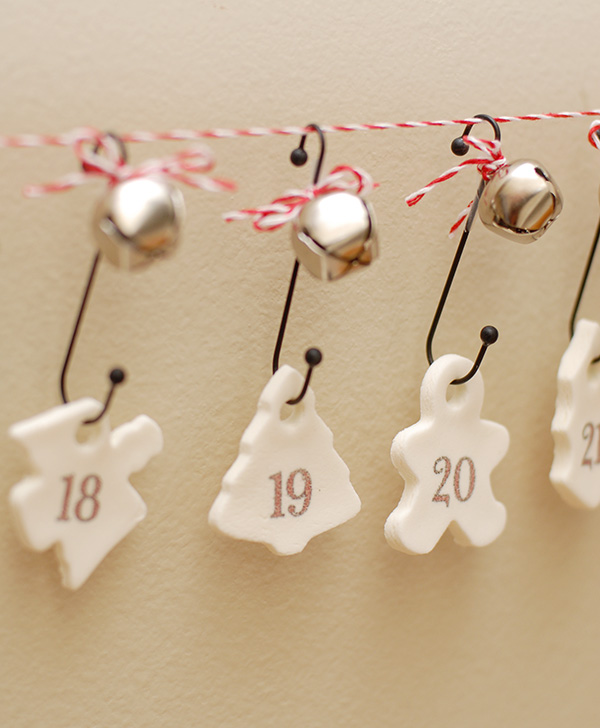
- ornament hooks
- jingle bells
- red ribbon
- freezer paper and inkjet printer
- sculpey or homemade white clay
ingredients for homemade white clay:
from the imagination tree
- 1 c. baking soda
- 1/2 c. corn starch
- 3/4 c. water
To make the clay, mix baking soda and corn starch in a pot. Add the water and turn flame onto medium heat. Stir until the water is absorbed and clay starts to form and pull away from the pot. Turn out onto the countertop. Let cool a few minutes then knead until it forms a smooth dough. Roll out like you would dough to about 1/4-1/2″ thick and use cookie cutters to cut out shapes. Use a straw to cut holes for the string.
*I found that if I waited to cut the holes with a straw my dough broke, so I cut the holes with the straw while the cookie cutters shapes were still in place. Place on a aluminum foil lined baking sheet and bake in a 200° oven for and hour or so until it had dried. Let cool on a wire rack.
To make the numbers on the ornaments, I used freezer paper. I cut the paper to letter size, and printed on the shiny side (you can get a PDF of my numbers here). You need to reverse your image for this process. Be careful not to touch the ink, or it will smear. Cut out the numbers and place on the ornament. Use your fingernail or a popsicle stick(I miss summer) to rub the number onto the ornament.
Hang your command hooks on the wall 5″ apart, leaving room for the ornaments to be slid from one side to another. Tye baker’s twine between the two hooks. I added ribbon to the hooks. Tye jingle bells to each ornament hook with baker’s twine (I used a small piece of clear tape to keep the string in place). Hook a numbered ornament on each hook and hang them on on the baker’s twine. Swear to get a better start next holiday season.