
 Remember those old jelly glasses from when you were a kid? They were the jars the jelly came in and they had cartoon characters on them. I remember a lot of loony tunes and Charlie Brown ones. They were just the right size for little hands, and if they broke it didn’t matter because they were free. My daughter recently turned 5, and has been announcing she is too old for “baby stuff”. High on the list for her are plastic kid cups. Those are for babies, not her. So only real glass will touch her little lips from now on. But now jelly comes in boring plastic containers. So I found some small juice glasses at Goodwill. Right size, but boring. So I went in search of some way to spruce them up.
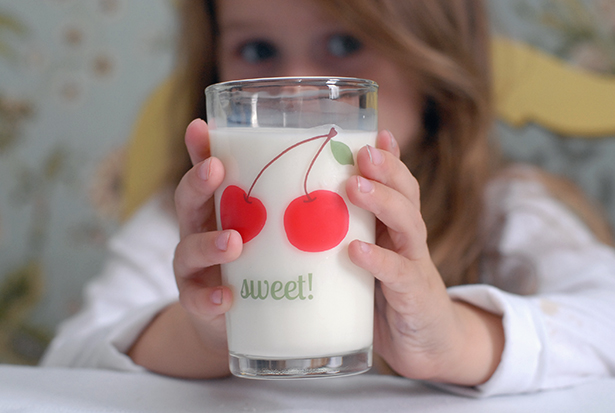
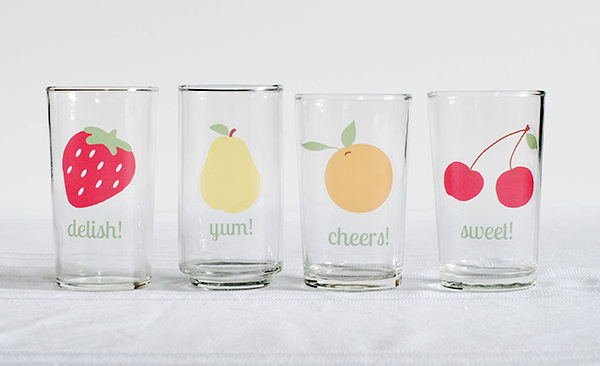
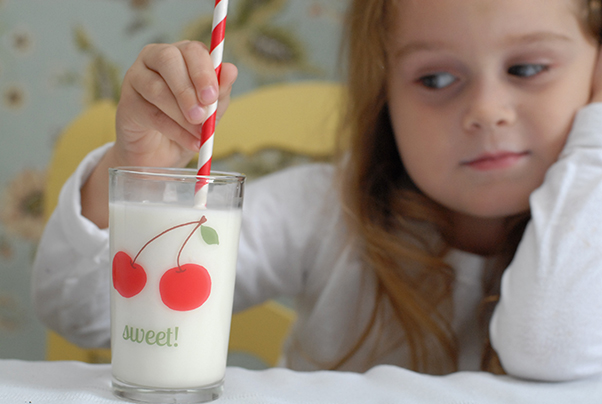
That’s how I found out about waterslide inkjet paper. This stuff is a crafter’s dream! Why haven’t I heard of this before? All the demos online are for adding sports logos onto coffee mugs, so maybe it’s a case of targeting a different demographic. But now that I know about it, I have big plans, baby! First up are my little (not) jelly glasses. I designed some cute retro graphics in photoshop (if you like them you can download a PDF here) and printed them onto the paper. Then you soak the label in water, peel of the back and transfer it to your glass. Easy. On glass, the decals looked a little faded from light coming through them, which I liked. On an opaque background or when the glass is full of milk, the colors pop! It’s not food safe, so don’t use it on plates. But glasses are fine as long as the decal is below where your mouth touches. I scored big brownie points with the kid, who loves that these are just for her. I did have to bribe her with a small present to get her to model for me, though.
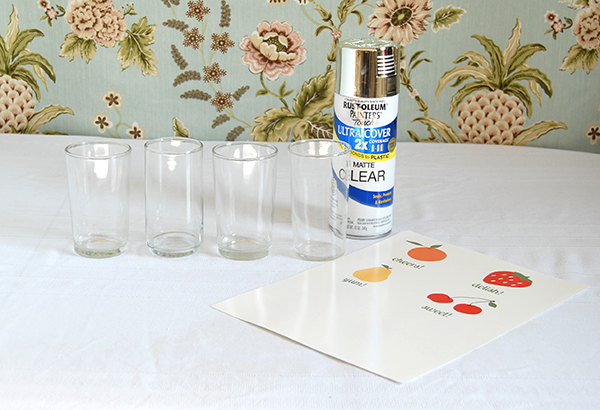
supplies:
- glasses
- acrylic clear coat spray
- 1 sheet inkjet waterslide decal paper
- newspaper
- scissors
- tape
- plastic bag
- bowl of room temperature water
- damp rag
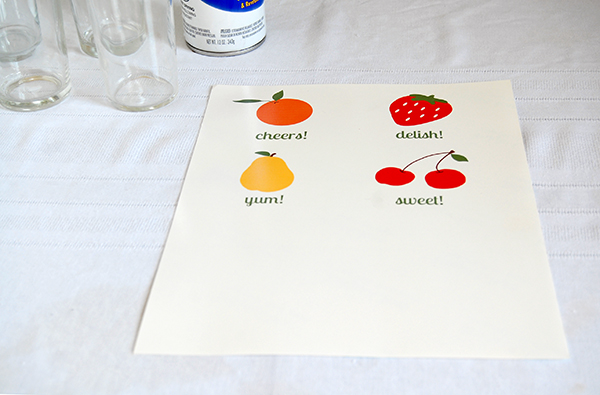
Once you have decided on your design, print them onto the waterslide paper using an inkjet paper. Make sure to set your printer settings to the settings recommended by your brand of paper. I set mine to fine printing on glossy paper. If you have a lot of extra blank paper like I did, trim it off and save it for a different project before the next step.
Spray an even coat of acrylic spray onto your paper. Do 2-3 light coats until paper is shiny, allowing it to dry for 1 minute between each coat. Allow to dry and set, 30-60 minutes. Cut out your image leaving a thin border around the edges.
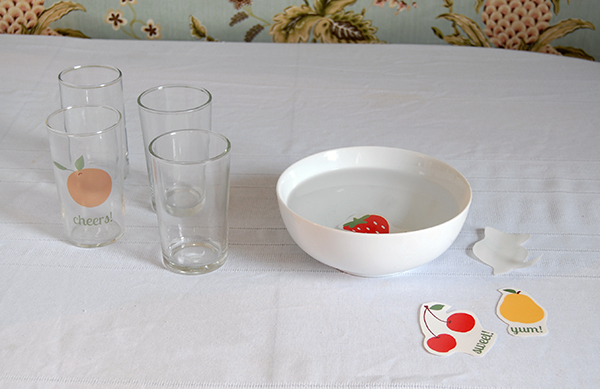
Place decals, one at a time, into the bowl of water. Once the backing starts to slide off, about 45-60 seconds, remove from water and peel off the backing. Apply decal to your clean glass. Use a damp rag to smooth your decal and mop up any excess water. Let dry. To protect your decal, tape off the decal-ed area, and cover the rest of the glass with a plastic bag. Spray decal with acrylic spray. Do several coats, letting each coat dry thoroughly.
These decals will not hold up in the dishwasher, but will handle being gently hand washed.
 What would you use waterslide decal paper for?
UPDATE: We used these glasses on a daily basis, and took care to wash them by hand. The labels lasted about 5 months before they started to look a little shabby. After that, I ran them through the dishwasher and was able to peel the labels off without leaving a residue.
Pingback: DIY: baking soda & powder jars eat, knit & diy
Pingback: DIY Retro Jelly Glasses | SuperCrafty