
 I love wallpaper. Don’t you? I can get lost looking at wallpaper sites. This actually happens a lot, and then I realize it’s 2 am and have to be up in 5 hours. However, I am a renter, and as decorating obsessed as I am, there is no way I am putting up wallpaper in a rental, because taking it off is hell.
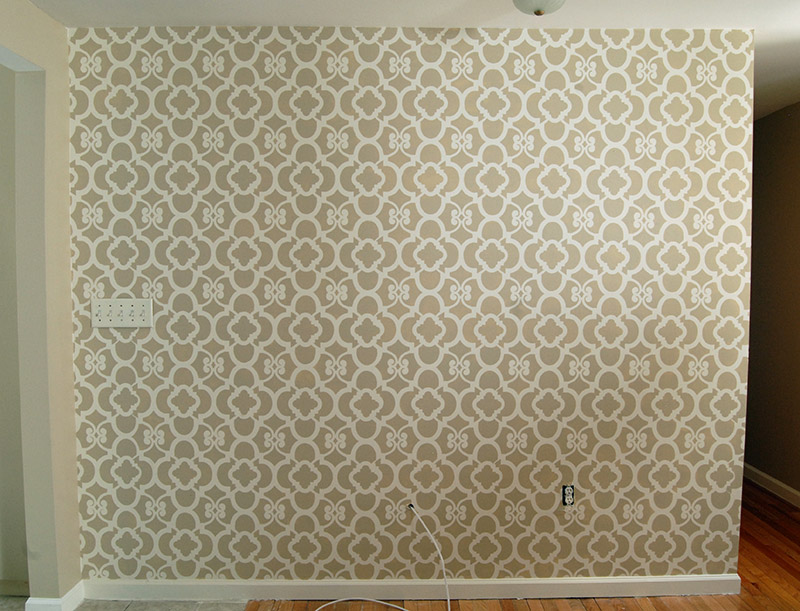
So I switched my focus to wall stencils. Just as excellent, easy to paint over when I move. And there is almost as much choice in stencils as there is with wallpaper. It took me a month of deliberation before I decided on one. And then I had to wait 5 months for the construction to happen in my apartment! So it took me and my stencil a long time to get together. But once I started, I had a lot of time to get to know it. Like, 8 hours, which is how long this took me! It was worth it. I have been staring at it lovingly for days. If you’re thinking about it, I vote yes. Here’s how to do it:
supplies:
- wall stencil
- paint
- foam roller and tray
- stencil brush
- spray adhesive
- level
- drop cloth
- newspaper
- tape
- paper towels or rags
- cleaning agent for stencil
- scrubbing sponge for stencil

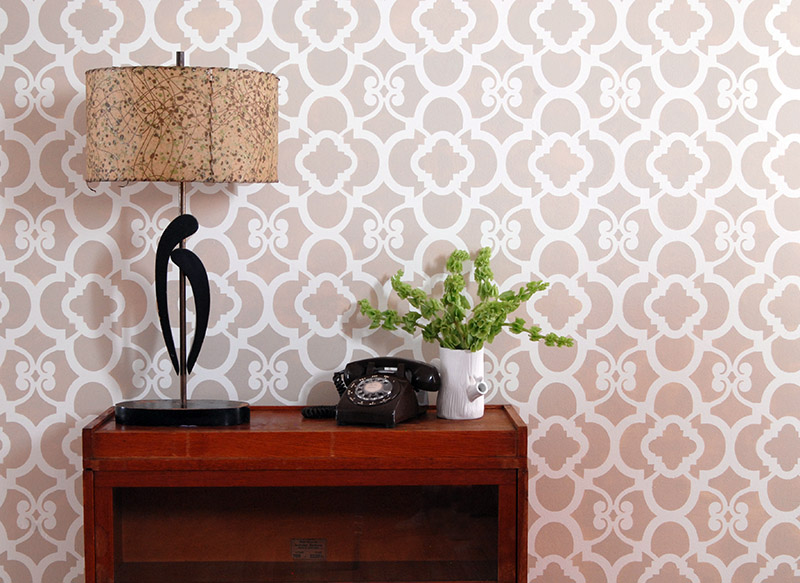
First thing to do is to to tape the area off that you want to stencil. Tape some newspaper on the molding and the ceiling so you don’t hit it with your paint and you get a crisp line. Now paint your wall the color you want the outline or secondary color of your stencil to be. I painted my walls and molding the same color, which is Benjamin Moore New Canvas (that I had matched to Behr. Looks great, much cheaper. For the main stencil part, the color is Benjamin Moore Manchester Tan, again matched to Behr.)
Once your paint is dry, you are ready to stencil! First thing to do is check with your level to make sure your ceiling is straight. Mine was in some areas, but not everywhere, so I leveled my stencil vertically whenever I started a new section. If your ceiling is level, no need to do this. Just start each vertical row with your stencil flush to the ceiling.

Now spread out your drop cloth and lay your stencil right side down on it (my stencil had the company name on it, so I could tell. But if yours doesn’t, no big deal. Just pick which side you want to use.) Spray lightly with your adhesive, making sure to get all areas. Pay special attention to any have a lot of cut out and detail. You want to make sure these are firmly attached to the wall so your paint doesn’t seep under.
Start in the middle of the wall. This way your pattern ends in the same places at both ends of the wall. Position your stencil flush against the ceiling and press firmly on all areas to make sure you have a good stick. Take your stencil brush and dip it lightly in the paint. Dab the brush onto your dry foam roller so that no visible paint is on the surface. This is called offloading. You can also use rags or paper towels to offload onto. I used the roller. It worked as well, was less messy and saved paint.

Now using a circular motion, fill the inside of your stencil cut out areas with paint. It should be very light. I started in the middle of the cut out and worked my way to the edges. If you begin at the bottom of your stencil and work your way up, the bottom part will be dry by the time you are ready to reposition your stencil. My picture shows me starting at the top. It took me a while to figure that trick out!

Once all your areas are lightly filled in, it’s time to use the roller. Roll it in paint, offload as much into the tray, then offload onto a rag or paper towel. You want no visible paint on the roller. Pressing lightly, fill in the stencil cut out areas. Be careful not to paint over the registration marks on the stencil(the tiny dotted lines on the four edges of the stencil. You need those.)
Carefully pull your stencil off the wall. Use the registration marks at the top to line up the stencil underneath where you just painted. Press the stencil firmly against the wall. Be careful not to smear paint from the wet stencil under the wall. You won’t need to re-spray adhesive yet. I needed to do that about every three moves.

Repeat all the way down to the bottom of the wall. Bend the stencil at the bottom against the molding or floor to get it flush. You may have to hold it in place with your fingers while you paint.
Now move your stencil over and flush against the ceiling. Check that your registration marks on the side of your stencil line up with the pattern already on the wall. Keep repeating until you have the whole wall covered. When you get to the corners, just bend your stencil into the corner to keep it in place.

Now that your wall is done, you have a bare strip left along the ceiling. Now’s the time to use your ceiling stencil. If your stencil didn’t include one, use your wall stencil and match your pattern so only a small part bends onto the ceiling. Make sure you have newspaper on the ceiling so you don’t get paint on it! Use the same technique as the wall stencil to fill in the ceiling, move along the wall, and you’re done!
There’s a lot of good places to buy your stencil. I got mine from Royal Design Studio. They are a little pricey, but a lot of great choices. Etsy also has some good options.
cleaning your stencil:
This part is no fun. The best thing to do is clean it right away, before the paint dries. But if you just spent hours stenciling a wall and want a break, throw it in the bathtub and cover it with water. When you’re ready, drain the water and spray the painted side heavily with spray cleaner and scrub with a steel wool or coarse sponge. I tried a few different things and I found the thing that worked best was Motsenbocker’s Lift Off Latex Based Paint remover. When you have the painted side clean, flip it over and spray again. This alone won’t take the glue off. I found that and Bar Keeper’s Friend worked pretty well. It does take a fair amount of elbow grease, though.

In case you wanted to know, the phone was my great aunt’s from the 50’s when she lived in Queens. It still has her old phone number on it (back when Queens was a 212!). The bookcase my husband found on the street while walking the dog the other day. It’s a Globe Wernicke, probably 150 years old (see the redo here). We scored!

Looks amazing! thanks for the share.
Pingback: What I did over summer vacation eat, knit & diy
Looks beautiful! Now I have an itch to make my own stencil ))) Thank you for the idea.
Pingback: Stenciling: How-To | The Budget Decorator
Pingback: Love Wallpaper, but don’t want the hassle? Paint a Triangle Pattern Wall! | whyallthefuss?
I’ve been looking to stencil my home office since forever until I came across your site. I really like your choice and I think this stencil would go just pretty much any part of the house as it is such a classic design. Where would I be able to find such pattern? Also, the colors you used are neutral, which in my opinion is perfect! Just loved it.
Cecillia, I got my stencil from Royal Design Studios. Cutting edge stencils also make some great patterns.
Your wall turned out fantastic! I love that stencil pattern.