

Every so often I am released from the bonds of childcare and free to wander the night on my own. When that happens, I usually go running for the Path train and head straight into Manhattan to spend some quality (aka drinking) time with my city friends. This is a group I’ve known since college, and I’m the only one who reproduced. So they spend a lot of quality (drinking) time together, and I, frankly, have a hard time keeping up with them.
So when the bottle of rum came out at our last encounter, along with the disclaimer that it would f*ck me up, I knew better than to even try it. Well, I tried a sip. Yep, not for me. But the bottle itself was incredible. Thick glass, bold graphics, little jug handle finger holes…and truly, anything with a Kraken on it does it for me. So I waited (not very long) for the bottle to be empty and stashed it in my bag. Before I had even crossed back under the Hudson river I was planning this lamp.
The little fact that I had never made a bottle lamp before did not discourage me. It shouldn’t discourage you, either. This is an easy project. You can buy a lamp kit at most hardware stores for about 10 dollars, and then all you need is a lamp shade. And personally, I am always in favor of having something unique and interesting in my house. And whenever I look at this lamp, it reminds me that I occasionally get to run free and be (a little) wild.
And while wiring this lamp is incredibly easy (you just hook the ends of wires around screw posts and screw tight), anything electrical does have the possibility to kill you. So be careful. If electrical work makes you nervous, ask a friend who’s done it before for help. Use common sense, and if my instructions are different than the ones on your lamp kit, follow theirs. I am not responsible for any mishaps.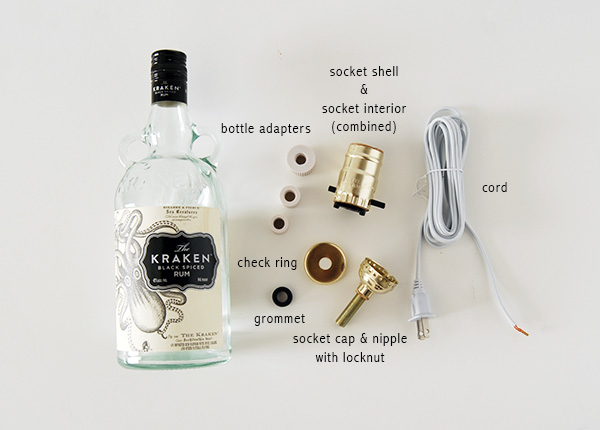
supplies:
- bottle
- lamp kit
- electric drill
- glass/tile bit
- paper
- duct tape
- electrical tape
- towels
- baking sheet
- grommet (same size as drill bit)
- screwdriver
- lamp shade
The hardest part of this project is drilling the hole in the glass. Liquor bottle have thick glass, and there is the possibility of cracking or breaking your bottle. You can skip this step, and run your wire through the socket cap and let in dangle in the back of your lamp. But if you’re like me and think it just looks better to have the wire run through the lamp and out the bottom, read on.
The first thing you need to do is decide where to drill your hole. Find a place near the bottom of your lamp (in the back) that is smooth glass, without any raised or depressed areas. Make a dot on a piece of masking tape and place that where you want your hole to be. The masking tape will help keep your bit in place as you begin drilling.
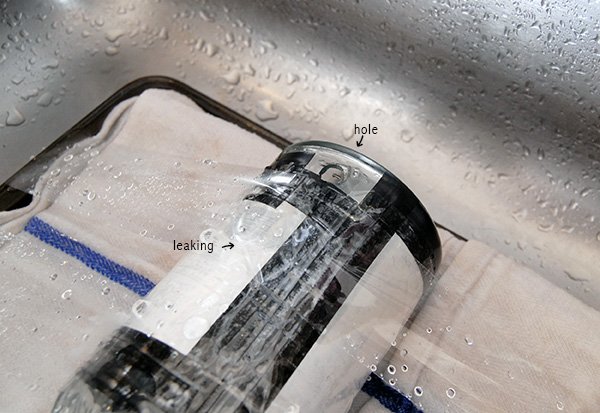
Now, prep your bottle. Cut your paper slightly larger than your labels. Tape it over the labels, then wrap electrical or duct tape around the bottle several times. This will keep your labels dry when you are drilling the hole, and keep glass from flying if you break the bottle. ( I used electrical tape on the edges of my paper, and packing tape around the bottle. I still had a little leaking onto my labels. Don’t be me).
Place a few towels on your baking sheet. Put your bottle hole side up and tape tightly to the baking sheet to keep it in place. Put the bottle and sheet in the bottom of the sink.
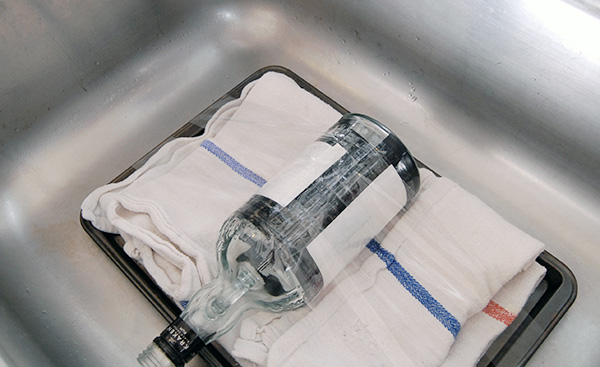
(Here I don’t have tape where my drill hole is, because I had already attempted to use a tungsten carbide bit to drill my hole. Technically, it should work on glass, but after an hour of drilling all I had was a small dimple in my glass. So I sprang for the better bit).
You should definitely protect your eyes when doing this next step. You need them, and if you ruin them doing this project, you won’t need a lamp anymore. Safety goggles should be worn. I couldn’t find mine since my daughter plays dress up with them, so I wore my sunglasses.
Position your drill bit straight over the hole mark and begin drilling. Go slow! Don’t use full power or press down too hard. Take your time, and every minute or so spray the hole and the tip of your bit with cold water. This helps to cool down the bit and lubricate the hole. Using the better bit, I had a hole in my bottle in less than 15 minutes.
Now that you’ve drilled the hole, peel of the tape and dry your bottle. Make sure it is completely dry! Electricity + water=very very bad. I used a hair dryer.
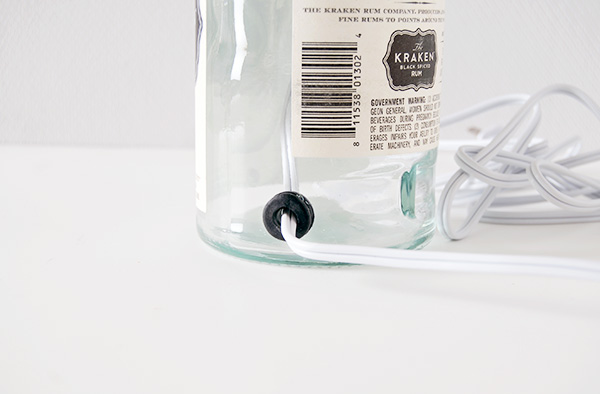
Now put the grommet in that lovely hole you just made. This is the 2nd hardest part. It takes some pushing and squeezing to get it in there. Keep going and try not to push it through all the way. (Do you still want to make a bottle lamp, or have I completely discouraged you yet?) Eventually, it will settle into place and look like this:
OK, the hard parts are done, the rest is easy. You’ll have a new lamp in less than 10 minutes.
Thread the wire through the grommet, bottle and out of the neck.
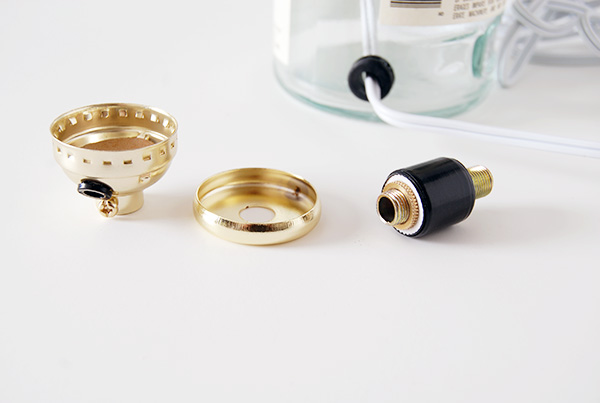
Pick the adapter that fits tightly into your bottle opening (in my case, none of them did, so I picked the closest one and wrapped electrical tape around it until it fit). Thread the nipple into the adapter until only 1/4″ remains showing above the lock nut.
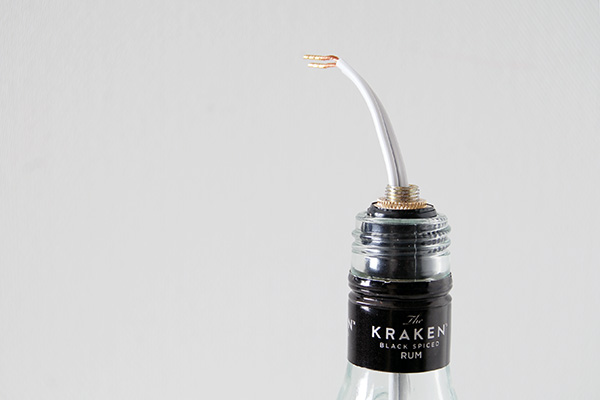
Run the wire through the nipple and adapter and push the adapter into the neck of the bottle.
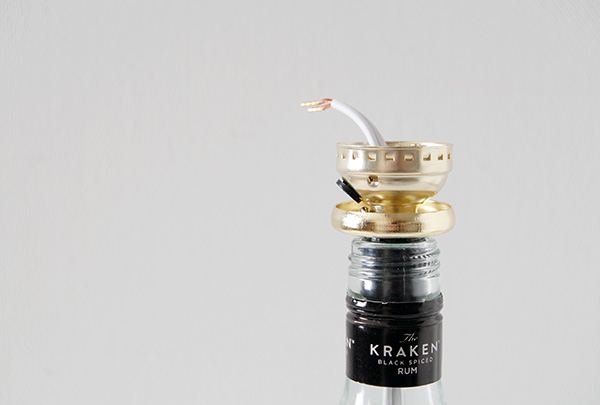
Slide check ring onto nipple. Thread wire through middle hole in socket cap. Screw the socket cap onto the nipple tightly.
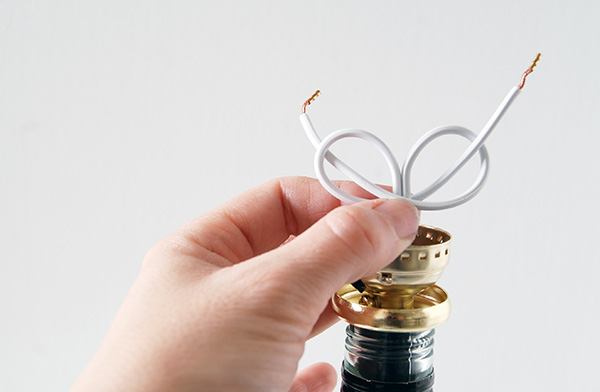
Pull more wire through the socket cap and separate the 2 strands. Tie an underwriter’s knot. Do this by making two loops, one strand crossing in the back and one in the front. Pass ends of strands through loops and pull to close the loops. Adjust knot so only a small length of wire is left after tightening the knots(less than I did in the picture!).
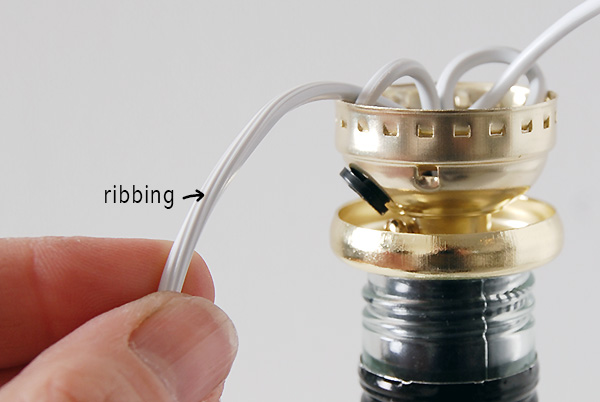
 Now look closely at your wires. One has ribbing. This wire is the neutral conductor.
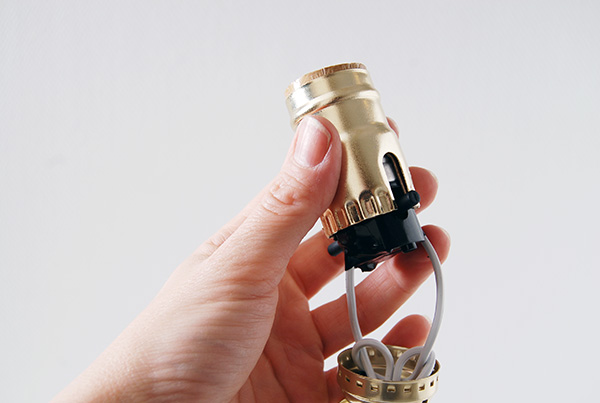
Attach the neutral conductor to the silver screw ( I am using the Westinghouse lamp kit. If you have a different brand that tells you something else, follow their instructions). Wrap the exposed end of the wire around the screw post on the socket interior and screw tightly. Don’t have any uncoated wire exposed. Repeat with the other wire and the other screw. I taped over my wires and screws with electrical tape to be extra careful. Slide the socket shell over the socket interior.
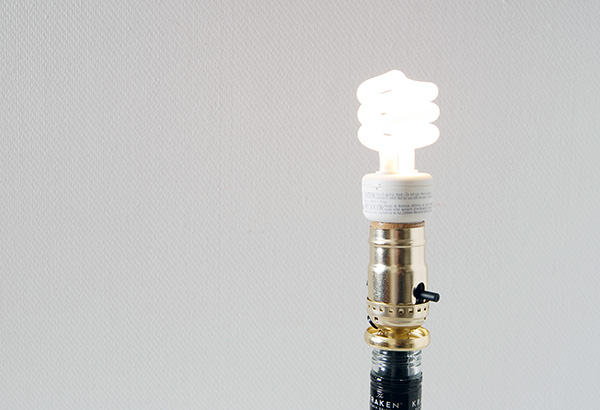
 If you have a lot of extra wire like I do, feed it back through the socket cap and adapter. Snap the socket shell into the cap until you hear a “click”. Now plug it in, screw in a lightbulb and give it a try. Light!
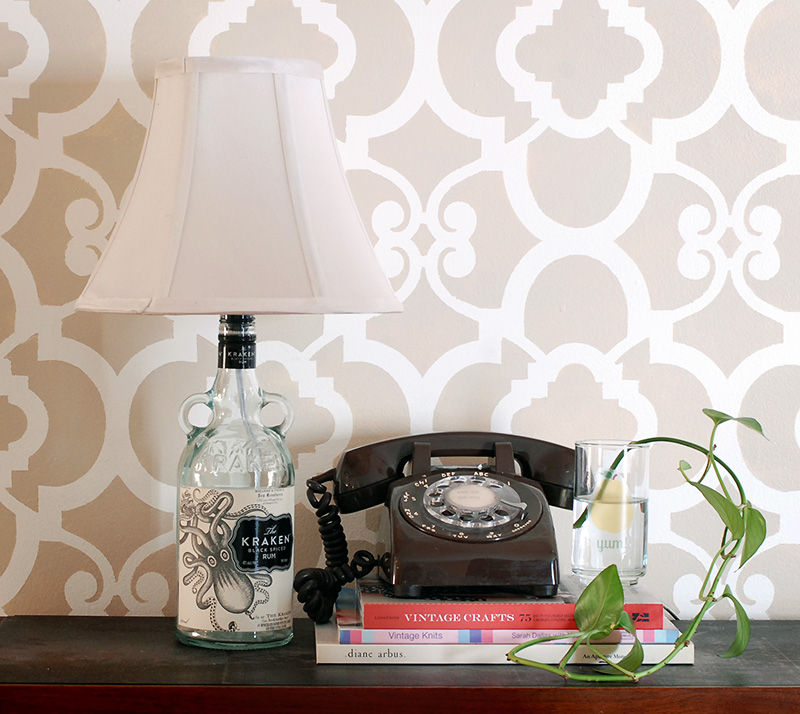
The lampshade I used fits onto the socket shell, so you need to put it on before screwing in the light bulb. If you have an old fashioned lampshade, you’ll need what’s called a harp. Attach the harp bottom between the socket cap and the check ring in that step.
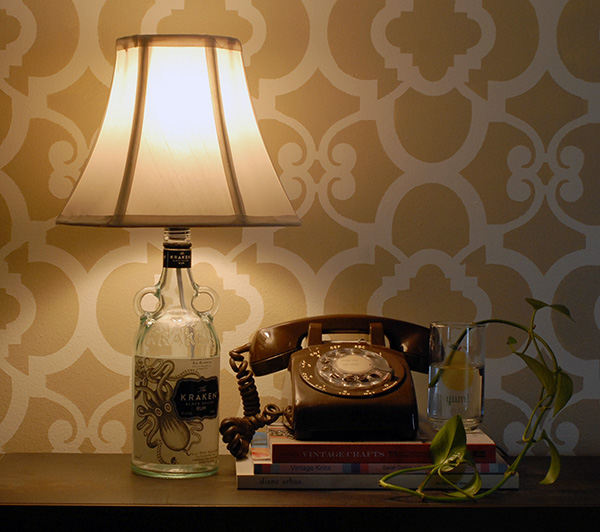 The Kraken lamp is a thing of beauty.
Thank you for the easy to understand directions.
Very good instructions and pictures. One question: What do the glass / tile bits look like?
Love this!! Thank you so much for sharing your process!
OMG I cannot believe you made this!!! I have been saving the very same bottle for so long wanting to do something like this but not knowing how! Thanks for taking the initiative and figuring it out 🙂 I am super excited to get my bottle going!
Sydney- You’re my lamp bottle twin!
This is really cool and so unique!